Showing posts with label tutorial. Show all posts

Saturday, November 20, 2010

We are crafting .... after a long time!

Hi everyone!! It has been quite a while since my last post and that's because I am just trying to follow one of my dreams! I will be having my own scrapbooking eshop!! It will be ready next week and I am simply sooo excited!Of course my free time is history but I love every step I take!

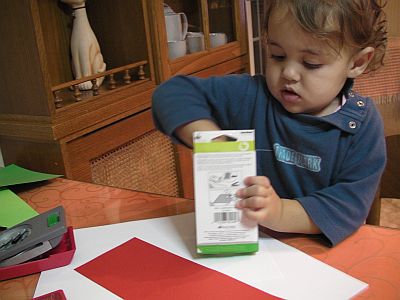
Tonight my son was feeling ... crafty and wanted to punch and stick so I thought it would be a great idea to make some simple cards all together!My daughter participated too!!She loves making a mess!LOL

So here we are crafting!!


 My daughter having fun ....


 This is Nikola's card.He decorated the back and the front with snowflake punch-outs
and we did some stamping too,


and here are the steps to make simple Christmas cards:
First I took a piece of cardstock and folded it, then I cut some patterned paper and a Christmas tree punch-out,

 I stamped on the tree,


 Used a 2nd punch-out


 Adhered  with some foams pads the trees and added some sequins,


 Finally assembled the card


Thank you for stopping by today!Enjoy the weekend!


Sunday, August 8, 2010

A 'princess and the frog' card

Today I would like to share this cute little card I made for a fairy princess.

I was looking forward to using this Magnolia stamp for so long
 but all my projects lately were all about boys!
So here it finally is!Pink and girly!


This is how I made the card:
First of all I stamped and coloured the Tilda and then I cut the image.

My next step was to cut this nestability die I had also not used (I need to make a catalogue of what I have because sometimes I forget things in my bottom drawer )!! This die reminds me of a doily and that's why I had bought it in the first place.Then I painted it  with shell pink dabber


Cut my cardstock,scored it and used my flower corner punch


Used the same border punch to make a tiny garden and used my snow cap dabber on the edges


and then started putting them all together


a flower on top and a sentiment ... the card is ready!


Thank you so much for all your lovely comments...
They really mean a lot to me!

Saturday, July 24, 2010

A summer mini album (tutorial) - Eνα καλοκαιρινο μινι αλμπουμ

I love summertime !
It is a great time to take fantastic photos and have fun with friends!
This is a mini for my friend Vicky to fill it in with her holiday memories from July.As she told me this will be the first mini album she will ever receive, since she hasn't participated in any mini album swaps yet.


So here is a quick tutorial on how I made this mini
First of all you cut the chipboard pieces you'll need and paint their edges

Then you choose the paper you like to use and adhere them on the chipboard.You can distress the edges according to the look you want your mini to have.
Now it's time to embelish!!

You'll end up with something like this

and now it's time to bind your mini!

I chose a binding ring for this mini.First you punch the first hole on your cover and then you mark your next punch like this on your next page(after you have aligned the pages)

After you have punched all your pages it's time to bind them with your ring.

Your mini is ready!Your memories through your photos will fill its pages           
Thanks everyone for stopping by! Have a wonderful weekend!